01949 845399
0Items:
£0.00Total:
- Blinds
 VALE Blinds Accessories
 Duette® Shades, the Original Honeycomb Blind
 Roller Blinds
 Large & Extra Large Roller Blinds
 Flat Roof/Lantern Blinds
 Duo / Multishade/Day & Night Roller Blinds
 Silhouette / Tri-Shade Blinds
 Vertical & Allusion Blinds
 Honeycomb Blinds
 Plisse / Pleated Blinds
 Roman Blinds
 Wood/Faux Wood Venetian Blinds
 Metal Venetian Blinds
 INTU / Clic Bead & Surface Fit / Perfect Fit / TruFit Blinds
 BlocOut / Cassette Blackout Blinds
 Next Day/Express & Fast Track Blinds
 Remote Control Blinds
 Blackout Blinds
 Conservatory Blinds
 Bifold Door Blinds
 Sun Tunnel Blinds
 Luxaflex Blinds
 Decora Blinds
- Skylight Blinds
 VALE Blinds for VELUX® Windows
 Genuine VELUX® Blinds
 VALE Blinds for Fakro Windows
 Genuine Fakro Blinds
 VALE for Roto Blinds
 Genuine Roto Blinds
 VALE for Keylite Blinds
 Genuine Keylite Blinds
 VALE for RoofLITE Blinds
 Genuine RoofLITE Blinds
 VALE for Dakstra Blinds
 Genuine Dakstra Blinds
 VALE for Dakea Blinds
 Genuine Dakea Blinds
 VALE for Balio Blinds
 VALE for Optilight Blinds
 VALE for Tyrem Blinds
 VALE for Duratech Blinds
 VALE for Okpol Blinds
 VALE for Skyview Blinds
 VALE for Jeld Wen Blinds
 VALE for Boulton & Paul Blinds
 VALE for Aurora Blinds
 VALE for Solstro Blinds
 VALE for Axis90 Blinds
 Genuine Axis90 Blinds
 VALE Custom Skylight Blinds
 Express Skylight Blinds
- Brands
- VALE Blinds
- Genuine VELUX® Blinds
- Genuine Fakro Blinds
- Genuine Keylite Blinds
- Genuine RoofLITE Blinds
- Genuine Dakstra Blinds
- Genuine Dakea Blinds
- Genuine Axis90 Blinds
 Clic Blinds
- Luxaflex Blinds
- Decora Blinds
- Duette® Shades, the Original Honeycomb Blind
- PT Wood/Faux Wood Venetian Blinds
 Starwood Wood/Faux Venetian Blinds
 Timberlux Wooden Venetian Blinds
 Sunwood
 INTU
INTU Bloc Blinds
 Hunter Douglas
 The Fabric Box
Departments
VALE Skylight Installation Guides
![]()
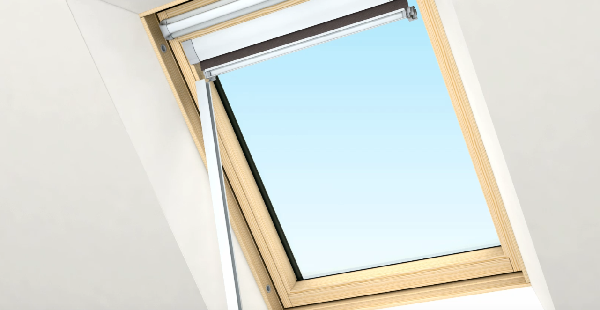
Skylight Blackout Blinds Fitted in just ten minutes!
There are some variations in fitting Vale Value blinds for differing manufacturers roof windows, and these are shown in the model-specific instructions supplied. However the basic installation procedure for each blind type follows the same straightforward procedure - take a look at the installation details to see just how simple the fitting process is.
1. Peel off the covering from the sticky stripe along the top of the cassette
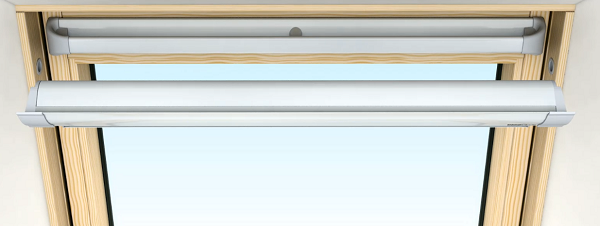
2. Position the cassette and press firmly into place
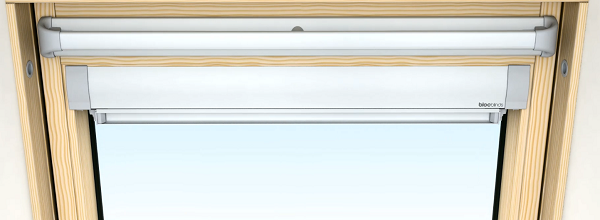
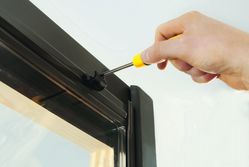
3.Whilst holding the cassette in place, using a handheld screwdriver only, secure the cassette into place on each side
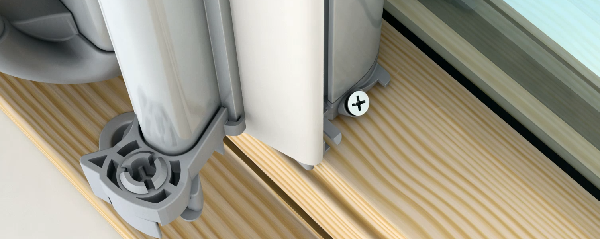
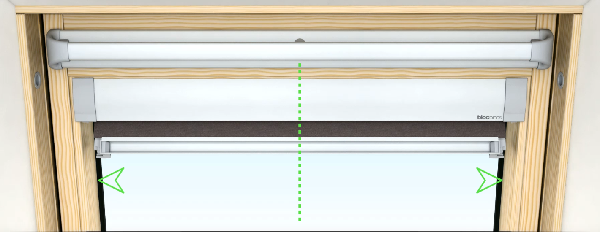
4. Check that the bottom bar in complete central with equal amounts of fabric sticking out on each side. If not move the bottom bar until it is central
5. Insert each side rail, one at a time, and secure at the bottom with the screw
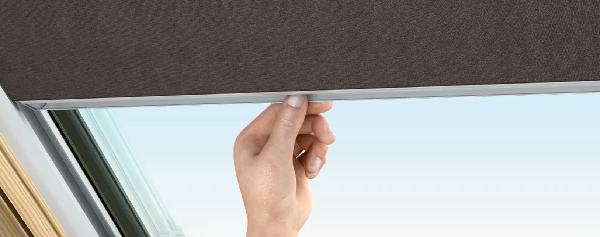
6. To operate your blind simply tip the bottom bar to release the brake, move the blind to the position required, then let go of the bottom bar to re-engage the brake
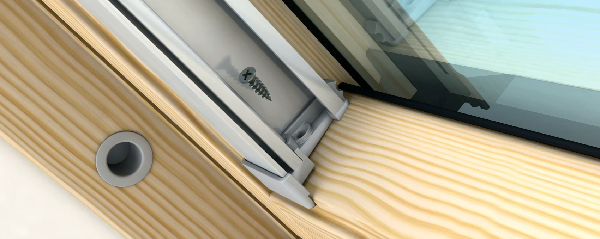
ITS AS SIMPLE AS THAT!
Installing a Vale Skylight Venetian Blind takes minutes
The installation for each make can differs, so it is important to read the installation instructions on the make you are purchasing for.
 |
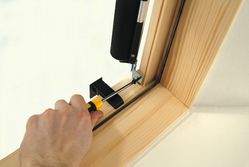 |
| 1. Left and right mounting brackets screw to the frame... | 2. ...the roller unit clicks onto the brackets and is secured by a screw at each side... |
 |
|
| 3. ..these brackets are then nailed to the frame in three positions, to secure the blind. |


Product Categories
Get in Touch
Telephone: 01949 845399
Email: info@valeblinds.com
Opening Hours:
Monday - Thursday 9.00am-5.00pm
Friday 9.00am-4.00pm
Vale Blinds Direct Limited
Devon Park
Normanton Lane
Bottesford
Leicestershire
NG13 0EL
